The ask, create new Dataverse tables for an upcoming initiative. There are several existing tables that could be used for this initiative, but the project requirements necessitated new tables be created. Because this is an upcoming initiative, business stakeholders aren’t ready to build the solution UI, even though Microsoft Copilot could create everything for them:
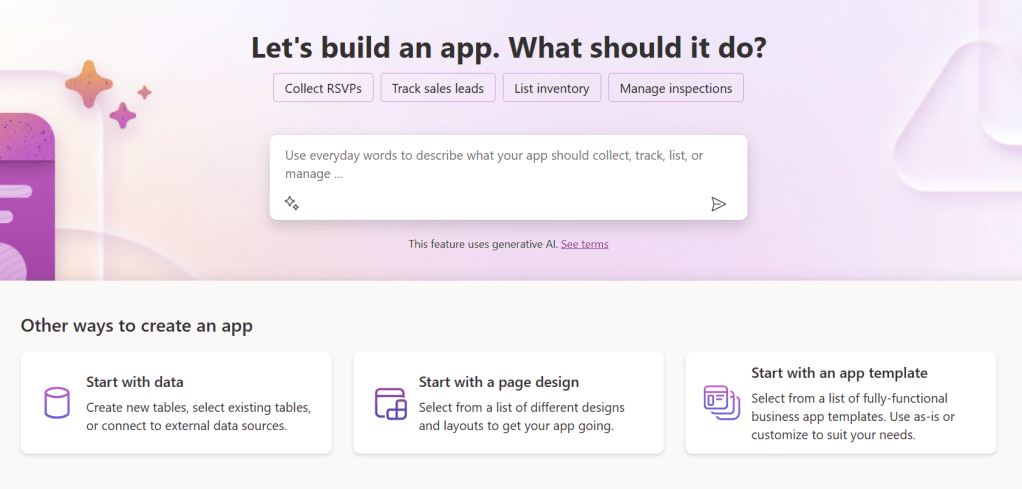
Nonetheless, Copilot can still help create these Dataverse tables. From the left-hand navigation of the Power Apps portal, select Tables, then select Create new tables from the New table drop-down options:

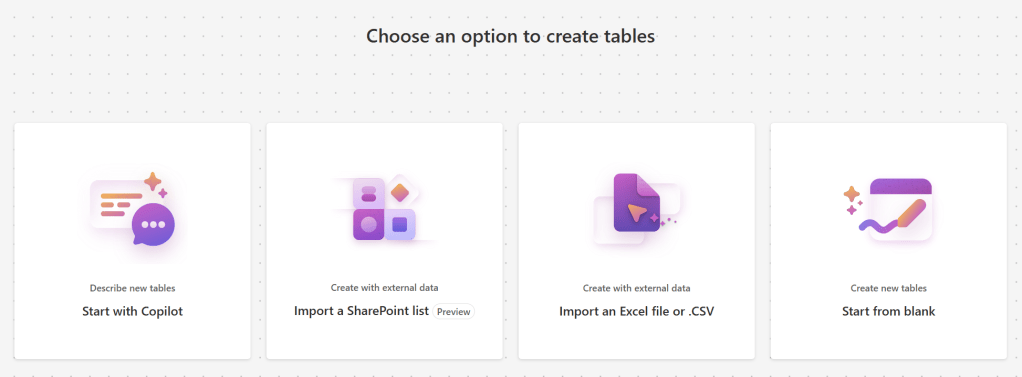
This opens a new Dataverse screen with four ways to create the new data tables: Start with Copilot, Import a SharePoint list, Import an Excel file or .CSV, or Start from blank. Choose the first option as Copilot is going to handle today’s prep work:
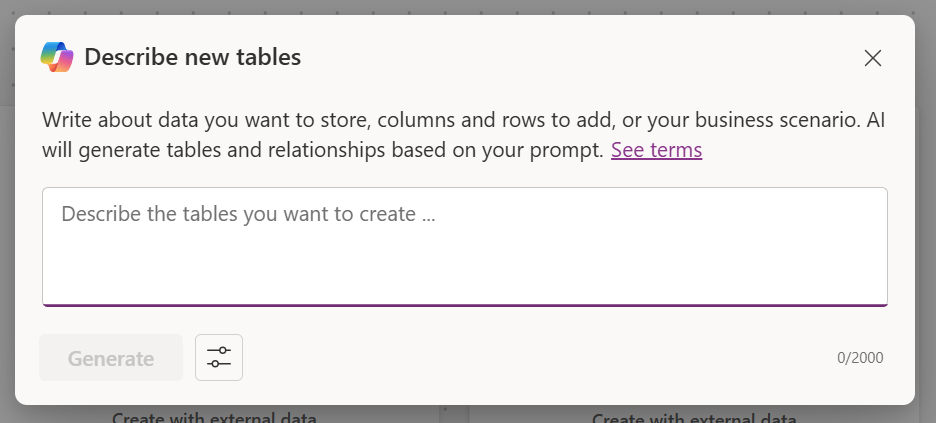
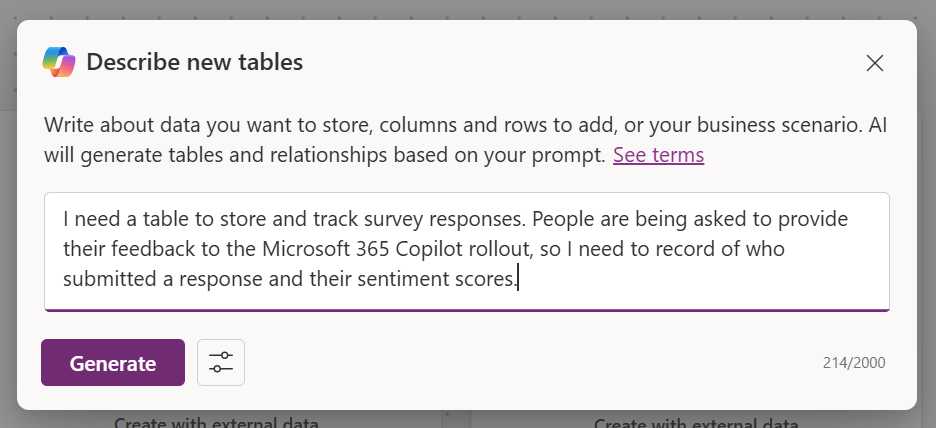
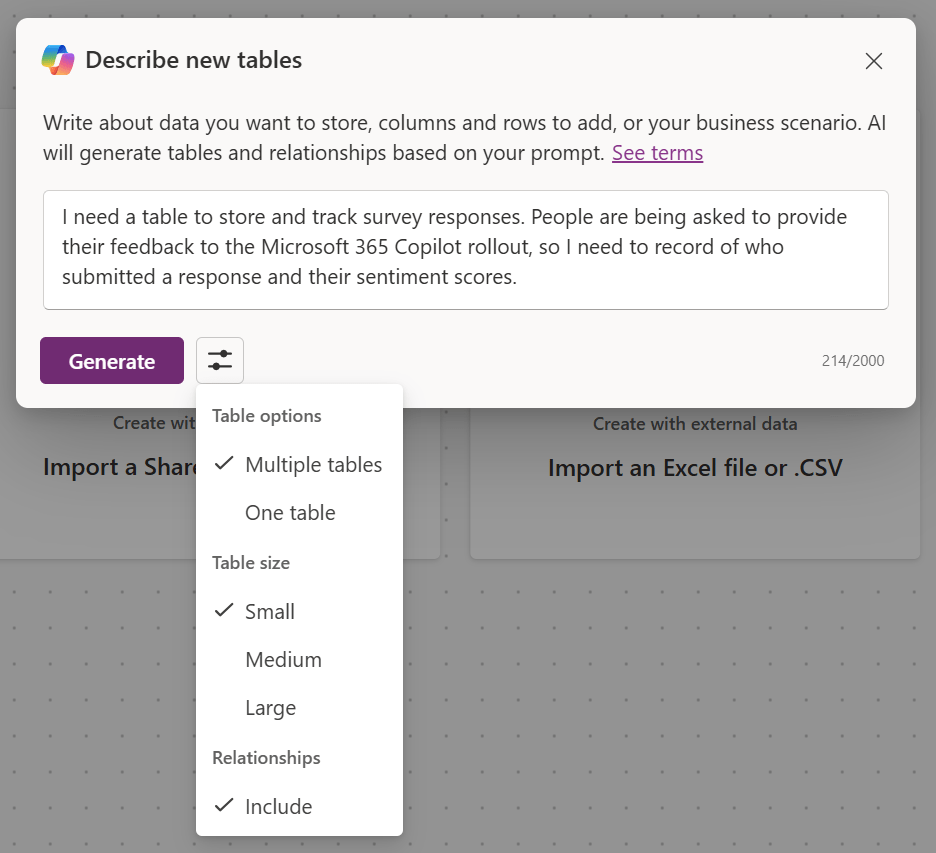
Now, because Copilot is as AI assistant, it needs to be instructed on what is needed. It doesn’t know the project requirements yet, so be as detailed as possible. In the prompt text box, tell Copilot the project scenario and explain what data needs to be captured:
Quick pause. Before generating the new tables, open and review the configuration settings. Should Copilot take the prompt and create a single table, or create multiple tables as needed? How big should these tables be? If multiple tables are created, should Copilot include the relationships between each of them? Don’t forget to review and adjust these settings before selecting Generate:

Depending on the prompt complexity, Copilot may need to create several tables with a bunch of columns. Provisioning could take a few seconds, or it could take a few minutes as it builds everything in the background:

Now, for this project’s prompt, Copilot decided that three tables were necessary: Sentiment, Survey, and Respondent. Each table addresses a requirement of the original prompt, and the table relationships were created. And as a bonus, the conversation is listed along the right-hand side of the screen. If needed, Copilot could be prompted to make additional changes to the data table suggestions:
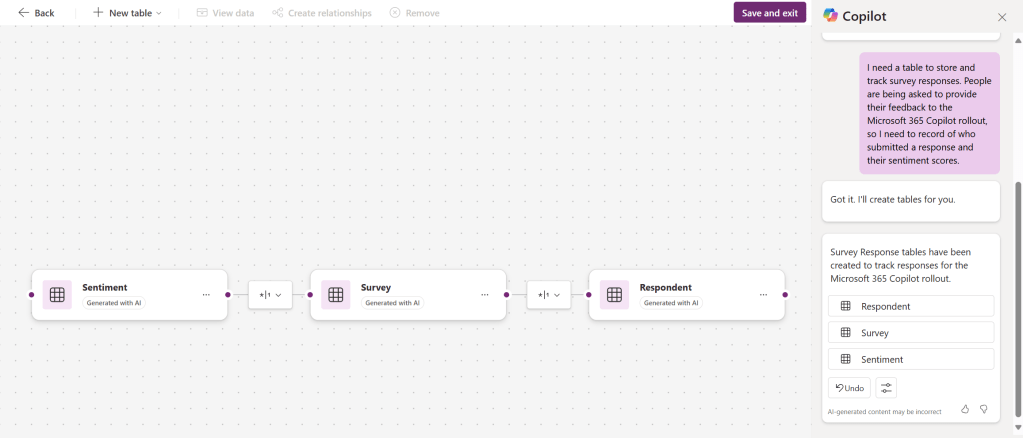
Important to note, the data tables are still mutable. Copilot can still be asked to make further changes. Or, as the prompter, changes can be manually implemented. Select the ellipsis ( … ) and review the available options:

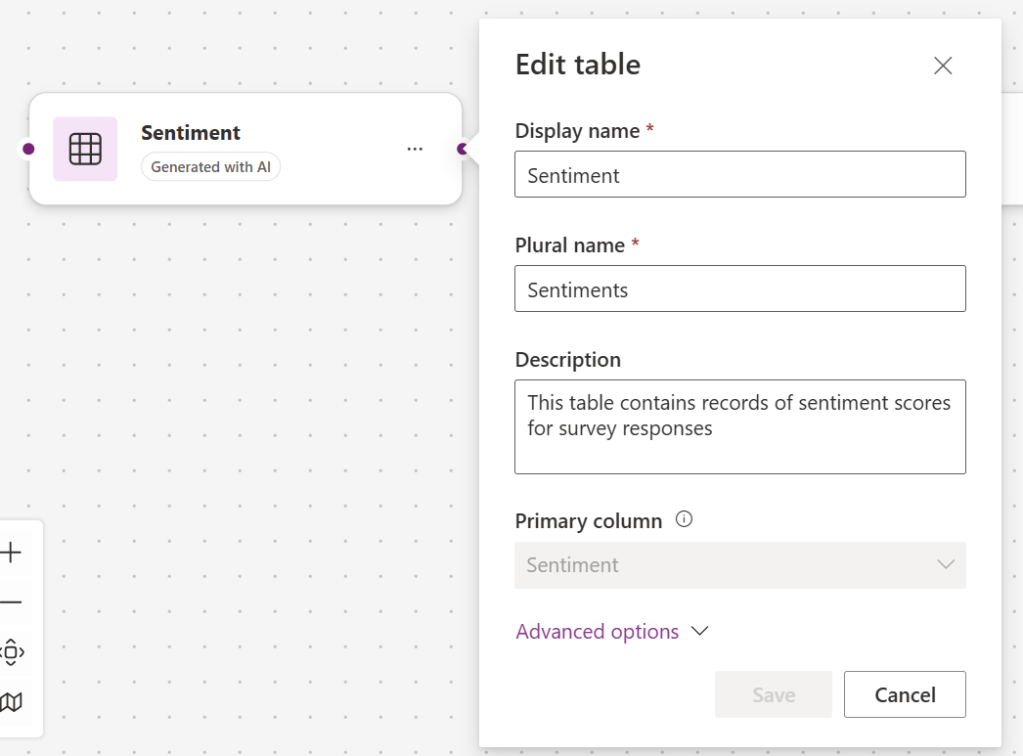
If the tables should be renamed for any reason, open its Properties and make tweaks as required:
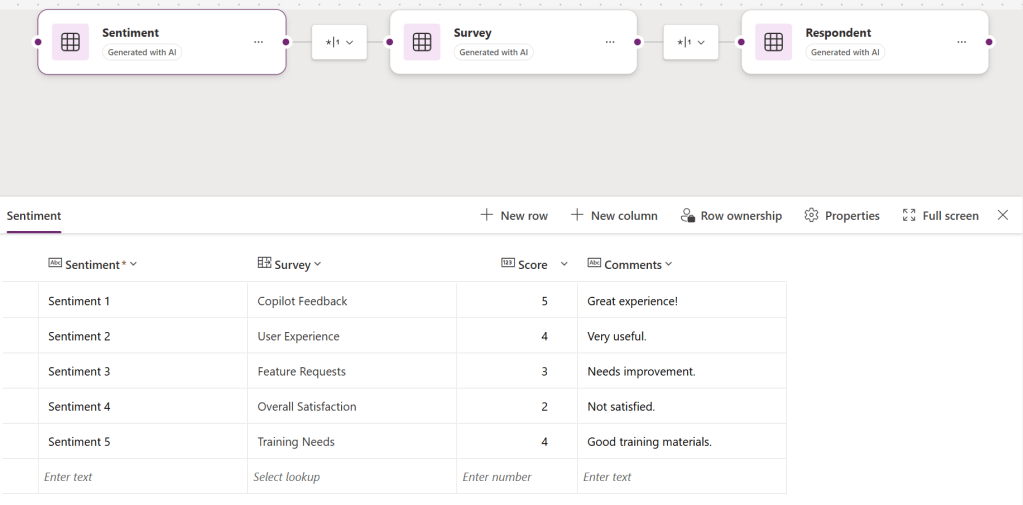
Even if the Properties are fine as-is, don’t forget to select View data and confirm the table columns. Add additional columns if Copilot missed any because again, Copilot is not the final result. Always trust, but verify the AI responses:
Then trust, but verify the other suggested data tables:


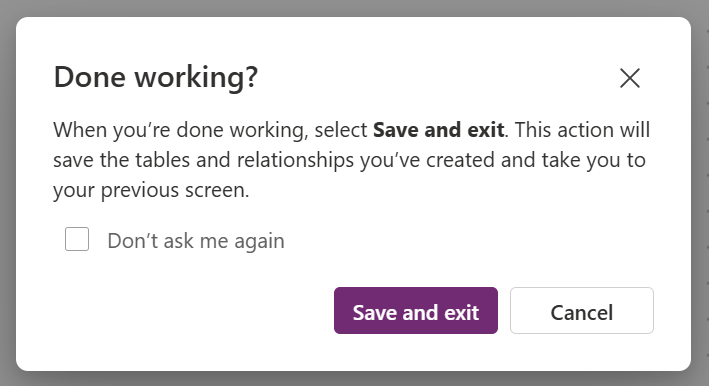
After verifying everything, to the right of the top-menu bar, select Save and exit, which will commit any and all tweaks, finalizing the new Dataverse data tables:

Lastly, confirm the selection because work is complete for now:
And voila, the Custom tables are provisioned, ready for use, as with any other Dataverse data table:

Conclusion:
Microsoft Copilot can provide assistance in many areas. In the Power Apps portal, it can create apps and data tables from scratch, making things easy for low-code devs. Though, sometimes business stakeholders aren’t ready build their project UIs. Even so, from the Microsoft Dataverse table screen, low-code devs can still leverage Copilot to create their project data tables. Copilot is here to help.
“Change will not come if we wait for some other person or some other time. We are the ones that we’ve been waiting for. We are the change that we seek.”
Barack Obama
#BlackLivesMatter
