Yes, there is a guid() expression available in Power Automate. The provided expression doesn’t accept parameters though, so for some people, there isn’t an easy way to control the GUID formatting. With that in mind, it might be worth creating your own GUID value:

After the cloud flow trigger, initialize a “counter” variable as an Integer. The logic of the cloud flow uses a Do until loop to create the GUID, so this “counter” variable is used to track the number of iterations before exiting the loop:

Next, initialize a “length” variable, also as an Integer. This specifies how many characters the GUID should have. Should it be 32 characters? Longer? Shorter?

Now, the flow needs to initialize an empty String variable for storing the actual GUID value. As the Do until loop processes, pieces of the GUID will be appended to this string variable.

Switching variable types again, initialize an Array variable for storing the letters of alphabet. To easily populate the array, add a string of comma separated letters, then split() the string using the comma as a delimiter:

E.g.,
split('a,b,c,d,e, ... ,v,w,x,y,z', ',')
Finally, getting into the core flow logic, add a Do until action. This action will loop until the “counter” value is greater than the “length” value. Don’t forget to increment the “counter” variable by 1.
Within the loop, add a Switch() step to the flow. In this scenario, the flow generates a random number between 1 and 4, inclusive of the number 1:
rand(1,4)

For those unfamiliar with Switch actions, they’re essentially another type of conditional logic. If-Then statements are binary and often repeat the condition. Taking an alternative approach, switch statements ask for the condition once, then makers can add multiple cases for the condition to evaluate against.
Here, the rand() expression is evaluating a 1, 2 3, or 4. If a “1”, then append a lower-case letter. If a “2”, then append an upper-case letter:
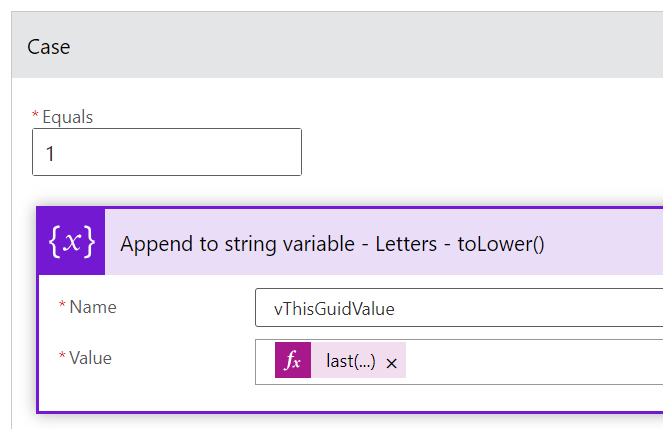

Use the array variable from earlier to append the lower- and upper-case letters:
variables('aListOfLetters')
Summarizing the logic of this step, get the length() of the array and subtract 1 because arrays are 0-based. Now, get a rand() number between 0 and the calculated array length, use the take() expression to return a subset of the array, then get the last() item of the subset.
Because the array is already full of lower-case letters, use the toUpper() expression to change the casing.
last(
    take({collection},
    rand(0,
        sub(
            length(variables('aListOfLetters')),
            1
)    )    )    )
For the last case option, the default, append a random number within the range of 0-9:
rand(0,9)

An optional last step, store the newly created GUID value using a newly initialized flow variable. Why? Because after running the flow, you can review the run log and check the GUID value.

E.g., expanded vGuid variable block after a successful run.

Conclusion:
Creating your own GUID value is useful when needing to control the length or characters of the GUID.
“The question of color was but another detail, somewhere between being six feet tall and being six feet under.”
James Baldwin
#BlackLivesMatter

Pingback: Office Scripts: Generate Custom GUID(s) | console.log('Charles');