The Power Platform is a Microsoft offering of tools to help organizations meet challenges effectively. Among these tools, there are some notable standouts:
- Power Automate – Create automated business processes.
- Power Apps – Create custom forms and portals.
- Power BI – Create rich charts, graphs, etc.
With their powers combined, one could easily build in-house solutions using [SharePoint Online] lists. One such solution is a manager approval system for employee reimbursements. Picking up from Part II of the series, Power Automate has populated the manager account and Power Apps dynamically toggles the approval fields. Next, create a dashboard of requests in Power BI. For this dashboard, it’ll be helpful to list the approver names…
- Copy the SPO site path.
- Open Power BI Desktop.
- Click Get data.

- Choose Online Services.
- Click SharePoint Online List.

NOTE: Connect using a Microsoft account.
- Provide copied SPO site path.

NOTE: Do not include path of the SPO list.
- Data preview screen:
- Click Transform Data.
- Create custom column:
- E.g., ApproverName

BONUS: View record properties.
Right-click and Drill Down into Approver column.

E.g., Approver properties: The Title lists the Display Name of the account.

- Click Close & Apply, then build report visual
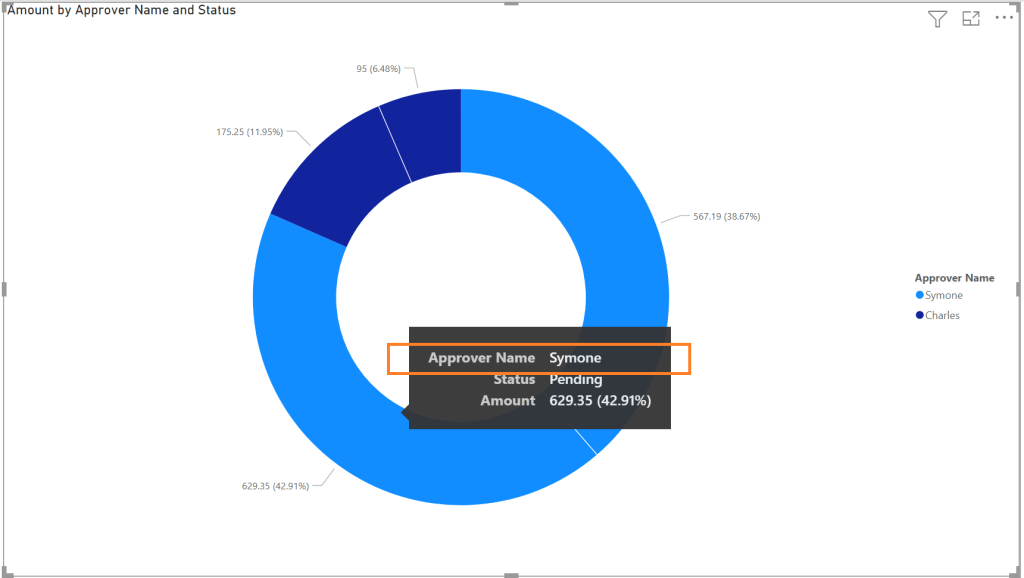
- E.g., Chart of requests by Approver and Status.
BONUS: Publish to Power BI workspace and embed on SPO page.

Conclusion:
With the Approver title extracted from the record, charts and graphs can be created with breakdowns for each Approver. These records contain several pieces of information specific to the user account. And additional visuals can be created with extracted Created By information. These visual dashboards can be presented to management for tracking reimbursement expenses…
“Education is the most powerful weapon which you can use to change the world.”
Nelson Mandela
#blacklivesmatter
